Our Playhouse Makeover
A DIY playhouse makeover has been something I’ve wanted to do since PRE-kids. Our oldest recently turned 10, so let’s just say life got busy with 6 kids, but this playhouse makeover has been on my to-do list for a long time. I’m so excited to dive into this project and create a beautiful outdoor playhouse for all my littles to enjoy.

Choosing An Outdoor Playhouse
I knew I wanted a solid, classic, cedar wood playhouse. (Plus, wood would be easier to paint than a plastic playhouse). KidKraft fit the bill with playhouses made of high-quality cedar wood and a child-friendly water-based stain. The Kidkraft outdoor playhouse designs are super cute and many are big enough to fit multiple kids inside.
I actually decided years ago that I would purchase a specific cedar playhouse, but the one I had my heart set on sold out at the onset of the pandemic. And trust me, I waited longggg and patiently hoping it would be re-stocked, but it never returned- bummer!
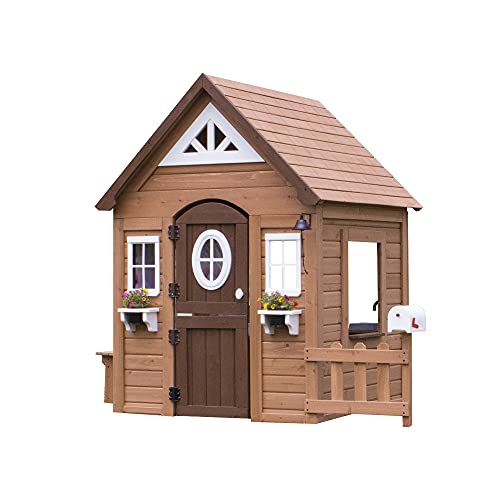
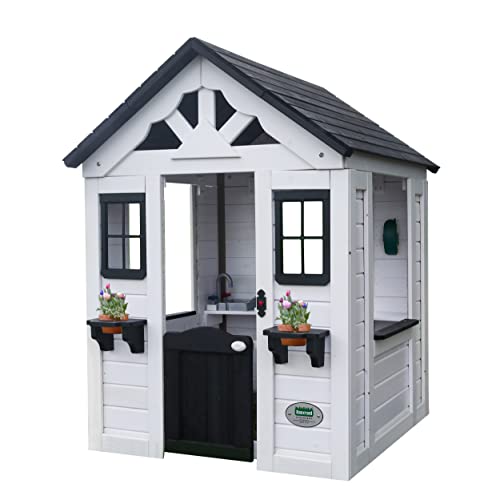
A newer version of the KidKraft Scenic View Playhouse in Wheat (looks like it’s discountinued- womp womp…) was added to their inventory and I love its natural tones as a starting point for this cedar playhouse makeover:

(NOTE: We bought ours on sale so be sure to check their website for sales, especially during the off season and holidays! SECOND NOTE: Our specific playhouse, along with many similar “traditional style” playhouses have gone out of stock- darn supply chain! Fingers crossed Kidkraft restocks soon. In the meantime, I’ll link some suggested backups from other brands at the end of this post.)
Outdoor Playhouse Features
The KidKraft Scenic View Playhouse in Wheat features a cedar frame, cedar roof, stovetop, sink, pots and pans hook, clock, chalkboard, doggie door, grill, grill tools, and open and airy counter space.
This model is great because it’s big enough to fit multiple children inside. If I have one bit of advice in choosing an outdoor playhouse, it’s to get one big enough to fit multiple kids!
I chose this one partly for the traditional style that fulfilled my vision for the playhouse makeover, but also because it was tall enough that my 10 and 8 year old wouldn’t have to duck inside, and wide enough that it wouldn’t feel cramped.
Surprisingly, many playhouses are very “closed off” with just a door and a tiny window, however I loved that this cedar playhouse felt like an “outdoor living space”- open and airy, multiple windows, open counters to set up a little playhouse bakery and have “customers” on the outside, and even a little breezy doggie door for the pups to join in!
We live across from the woods and we had a little SKUNK visitor, no joke, enter through the doggie door- ha! Not sure why our little nocturnal friend was exploring our backyard in the middle of the day, but luckily no one was outside when this was going on!
DIY Playhouse Makeover Details
Building The Playhouse:
Don’t you love when you come across a post where a blogger has a “very handy husband” and they say “this is what I custom-designed in my head and hubby built it from scratch for me!”. Well over here, with 6 kids and 2 old labs, we don’t have the time OR patience to tackle building a playhouse. And I wouldn’t say my husband is the “handiest of the handymen” out there (😛). So we outsourced!
But I DO love the makeover part. Designing, painting, decorating, photographing, making memories, etc.
But if you’re handy, or have a handy spouse/relative, then expect to put in at least half a day of working on putting all the pieces together.
TIPS: While it’s ideal to build the playhouse in the location you want to eventually place it, it’s not necessary. It’s a solid, heavy playhouse, but moveable. My husband and I moved it together multiple times, and I’ve moved it solo by pivoting one side across the yard. If you’re going to paint the playhouse, keep it in a location that’s best for painting, then move it later where you’d like it stationed.
A Serena and Lily inspired Playhouse Makeover
First and foremost, I love a traditional home with a cedar shingle roof. I knew I wanted to leave the cedar “as-is” and I’m SO lucky this specific playhouse was sold with the roof unpainted and unstained.
Secondly, a Serena and Lily store opened nearby, and I love the store’s white brick exterior with the most lovely French blue shutters.

So, when I spotted the painters painting those shutters, in crazy-mom fashion, I swiftly left the kiddie corner playground (with my kids, not abandoning them there) to approach them to see if they could share the details.
So glad I did!!
I found myself gravitating toward wanting to create an almost “Serena And Lily Inspired” playhouse exterior- I envisioned a mini exterior of the nearby store. I love how the evergreens pop against that crisp white brick, and how lovely are those light blue shutters?!
Painting The Kidkraft Playhouse

The white brick of the Serena and Lily store was painted in Benjamin Moore Simply White and the gorgeous French blue shutters were painted in Farrow and Ball Parma Gray. I love, love, love Parma Gray- it’s just what I mentioned previously, this perfect French-blue that looks beautiful paired with whites and greens.
(You can order a larger sample swatch of Parma Grey HERE, and Simply White HERE).
Ready to Paint?
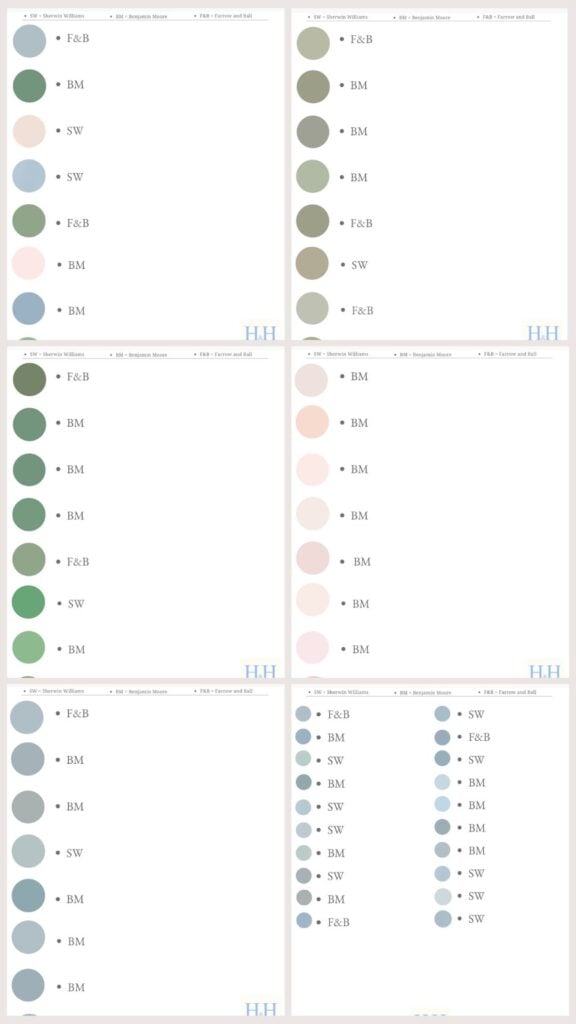
Get My Best-Selling Paint Color Guides!
From gorgeous coastal blues to beautiful grandmillennial greens, from preppy pinks to muted earthy greens, these classic paint colors are the tried and true go-to’s of some of your favorite interior designers!
Now, I didn’t have room on this playhouse makeover to add shutters, so I opted for a beautiful Parma Gray door! I also decided to add Parma Gray to the larger counter top, as well as the back ledge. The rest of the house exterior and interior was painted Simply White- a beautiful warm, crisp white. And I left the interior cedar ceiling untouched, just like the exterior roof, to balance out the crisp white with some warmer wood tones. You can see a glimpse here:

Before the house was put together, I painted the front door FIRST, using painters tape to cover where needed. I painted a coat of primer (Benjamin Moore Fresh Start Interior/Exterior Acrylic Primer), let dry, painted a coat of Farrow and Ball Parma Gray (Exterior Eggshell), let dry, and added a second coat of Parma Gray.
I waited a full day between each coat (or more) solely because that’s the soonest I could get around to it! You could paint the first layer of paint a few hours after your coat of primer if you’d like.
Once everything was dry, I removed the painter’s tape and, voilà! A beautiful Parma Gray door. 😍
I’m the kind of person that prefers to paint things fully assembled. It’s how my brain works. I’d rather be on my hands and knees on the ground painting the interior of a kids playhouse than painting piece by piece pre-build. So with the exception of the front door, I finished painting everything else once the outdoor playhouse was put together.
I continued to paint the other spots that were going to be Parma Gray (the counter and back ledge), in the same fashion: painters tape on the edges, 1 coat of primer, let dry, 1 coat of Parma gray, let dry, 1 coat of Parma gray, let dry.
(NOTE: Learning from my mistake, I actually recommend waiting until the end to paint the counters/ledges, because whatever color you paint the TOP interior (walls/beams/ceiling) will most likely drip onto the ledges a bit. Or even lightly splatter from the painters brush. So either do the ledges/counters LAST, or be prepared to cover the painted ledges with painter’s plastic/drop cloth).


Note: While the painter’s plastic / drop cloth worked great, I realized I needed a little bit of elevation for the playhouse so the paint wouldn’t stick to the covering. So I grabbed a few flatter stones to prop up the house on all 4 corners (as shown above), and then I pulled the painter’s plastic underneath the playhouse, and this worked great!
Spray Painting The Playhouse Accessories
For the playhouse interior, I knew I wanted brass accents. Before installing some of the playhouse accessories, I laid out an old large plastic bin cover (you could use a big cardboard box, plastic drop cloth, etc), and prepared to spray paint.
Note: Make sure to follow directions for shaking the can of spray paint, and make sure it’s not a windy day! (Or at the very least that the wind is blowing away from you).
I used this Rust Oleum brass colored spray paint (in Pure Gold) to spray the pots and pans hook rack, the sink faucet and handles, and the knobs of the stove. I let dry, then sprayed the other side, let dry, then repeated the whole process to give it a solid 2 full coats of brass colored spray paint. This was done over the course of a few days.


I love how the brass touches turned out for this kitchen! It feels timeless, and looks oh so pretty!


Changing up a few things
I decided we really didn’t need the doggie door “flaps” that hang down, so I opted to take those down and leave the doggie door open and airy. And the kids have liked using the opening as a little entry/exit for toys, accessories, or popping in and out themselves.

I also didn’t need the grill that came with the playhouse. I thought it was nice to have a beautiful Parma Gray painted open countertop vs a grill, since my kids love to play bakery/lemonade stand/restaurant/grocery store instead. You can see how much open space there is now without a grill installed on the countertop:


Lastly, the playhouse came with light gray planters that hang below each window that I decided I would leave off, at least for now. This allows for more flexibility with adding my own planters throughout the changing seasons, like these beautiful trellis planters with faux evergreens here:

Choosing The Right Surface: Pea Gravel
When we moved into this house nearly 6 years ago, the far end of our backyard was essentially a giant mud pit with a couple random shrubs. We did an entire DIY backyard makeover where, to the left of our giant Elm tree, we converted it into a kids swingset area with playground mulch. While, to the right of our giant Elm tree, we converted it into a pea gravel outdoor living area- equipped with a hammock and room to add outdoor furniture.
I envisioned a European-inspired feel with taupe pea gravel underfoot, just like the English or French countryside. Well, we have yet to add the outdoor furniture, but let me tell you- the kids love this space, and we do too. This specific pea gravel (from Home Depot) is a beautiful neutral color, (and super inexpensive to DIY), and it’s the perfect surface material for the outdoor playhouse. It’s easy on little toes, and it won’t get muddy (or kill the grass!).

We made the pea gravel border with larger stones that our family collected from our hometown Lake Michigan beach (which is also where my husband and I met many moons ago- I love that we can add something a bit sentimental to this project 💕 ).

During the painting process, I had the playhouse set up in a grassy area and boy did I deal with BUGS. Lots of bugs. Spiders, earwigs, spider webs, more spider webs. But once complete, I moved the house to the pea gravel area and we’ve been completely insect-free!

So if you have a small area to devote to a little DIY pea gravel backyard space, I recommend it for a playhouse location. It would also work well on any type of stone/hardscape/patio. But, be warned, if you do decide to place it in the grass, you may need to take some precautions against buggy visitors (like this peppermint spray and this natural powder bug repellent).
Playhouse Makeover Decorating & Final Touches

Once the building and painting part of the playhouse makeover was complete, I wanted to add a few final touches! I added these faux cedar evergreens on each side of the front door, darling floral trellis planters (I hope they bring these back to Pottery Barn!), and kids kitchen toys and decor inside- pots and pans, cooking utensils, English garden plates, and plenty of pretend baked goods like cupcakes, croissants, and cookies!


It makes my mom-heart happy to see how much the kids LOVE this playhouse, and it also makes my “I like pretty things” heart happy to see this outside my window in the backyard each day. A win-win!
I’m excited to decorate the playhouse throughout each season- so stay tuned!

Sources:
Benjamin Moore Fresh Start Primer
Tabletop Chalkboard Easel (similar)
Toy Croissant and Baguette (similar)
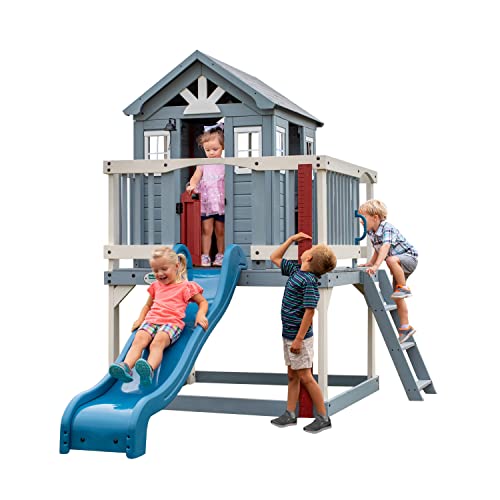
Note: While KidKraft isn’t currently selling many “traditional style” playhouses, there are a few other brands that have some cute options- the pricier ones linked below, and the less expensive Backyard Discovery. (If you own one, let me know how the quality is!). Here are a few:
I love shopping at Maisonette and trust their quality standard, so here are a few beautiful playhouse options found on their site: Playhouse ONE, Playhouse TWO, Playhouse THREE , And This 2 story playhouse is SO pricey but so pretty!
And here are a few of the less expensive outdoor playhouses:
Ready to Paint?
Get My Best-Selling Paint Color Guides!
From gorgeous coastal blues to beautiful grandmillennial greens, from preppy pinks to muted earthy greens, these classic paint colors are the tried and true go-to’s of some of your favorite interior designers!
( **If you love this post and want to see more kid-related DIY projects and Mom Life hacks, be sure to FOLLOW ALONG ON PINTEREST! )
Other Posts You’ll Love:
New Sibling Gift Ideas: Big Brother And Big Sister Gift Ideas From Baby
Baby’s First Easter: Easter Basket Ideas For Babies
Kid-Friendly Things To Do In Door County
Easy Bento Box Lunch Ideas For Kids
Kid-Friendly Things To Do In Lake Geneva Wisconsin